Showing posts with label Tutorials. Show all posts

Friday, November 29, 2013

How to Create a VPN Server on Your Windows Computer Without Installing Any Software

How to Create a VPN Server on Your Windows Computer Without Installing Any Software

create-vpn-server-in-windows
Windows has the built-in ability to function as VPN server, although this option is hidden. This trick works on both Windows 7 and Windows 8. The server uses
the point-to-point tunneling protocol (PPTP.)
This could be useful for connecting to your home network on the road, playing LAN games with someone, or securing your web browsing on a public Wi-Fi connection – a few of the many reasons you might want to use a VPN.

Limitations

While this is a pretty interesting feature, it may not be the ideal way to allow VPN connections to your local network. It has some limitations:
  • You will need the ability to forward ports from your router.
  • You have to expose Windows and a port for the PPTP VPN server directly to the Internet, which is not ideal from a security standpoint. You should use a strong password and consider using a port that isn’t the default port.
  • This isn’t as easy to set up and use as software like LogMeIn Hamachi and TeamViewer. Most people will probably be better off with a more complete software package like those two.

Creating a VPN Server

First, you’ll need to open the Network Connections window. The quickest way to open it is to press the Windows key, type ncpa.cpl, and press Enter.
open-ncpa.cpl-on-windows-8
Press the Alt key, click the File menu that appears, and select New Incoming Connection.
windows-new-incoming-connection
You can now select the user accounts that can connect remotely. To increase security, you may want to create a new, limited user account rather than allow VPN logins from your primary user account. (Click Add someone to create a new user account.) Ensure the user you allow has a very strong password, as a weak password could be cracked by a dictionary attack.
windows-select-vpn-user-accounts
Select the Through the Internet option to allow VPN connections over the Internet. You can also allow incoming connections over a dial-up modem, if you have the dial-up hardware.
allow-vpn-connections-through-the-internet
You can then select the networking protocols that should be enabled for incoming connections. For example, if you don’t want people connected to the VPN to have access to shared files and printers on your local network, you can uncheck the File and Printer Sharing option.
select-vpn-networking-protocols
Click the Allow access button and Windows will set up a VPN server.
allow-vpn-access-in-windows
If you want to disable the VPN server in the future, you can delete the Incoming Connectionsitem from your Network Connections window.
delete-incoming-connections-vpn-server

Router Setup

You will now need to log into your router’s setup page and forward port 1723 to the IP address of the computer where you set up the VPN server. For more instructions, read How to Forward Ports on Your Router.
For maximum security, you may want to create a port forwarding rule that forwards a random “external port” – such as 23243 – to “internal port” 1723 on your computer. This will allow you to connect to the VPN server using port 23243, and will protect you from malicious programs that scan and attempt to automatically connect to VPN servers running on the default port.
You can also consider using a router or firewall to only allow incoming connections from specific IP addresses.
To ensure you can always connect to the VPN server, you may want to set up a dynamic DNS service like DynDNS on your router.

Connecting to Your VPN Server

To connect to the VPN server, you will need your computer’s public IP address (its IP address on the Internet) or its dynamic DNS address, if you set up a dynamic DNS service above.
Use the Connect to a network option in Windows and enter your computer’s public IP address. Provide the username and password you created to log in.
For more instructions on connecting, read How to Connect to a VPN on Windows.

Thursday, May 16, 2013

Top 5 ways [how] To Make Money Online Without Blog

Best money making methods online without blog

online money making methods
 We have a lot of websites and blogs, and many ways and ideas to make money online making money online will be discussed, but I for New Comers learners, they are very hard to consider blogging newbies and even when you are not able to see the money invested in hosting and domain name. There are 5 ideas to make money online with their blog here


5 Best Ideas to make money online

You need to have when you're ready to make money online, the first step is
some knowledge and strategies. You have to be creative. The easiest way for me to earn money online is blogging. I always recommend blogging to anyone who is interested in monetizing the user's, but the 5 Ideas to make money online from blogging these methods to try to achieve a victory for those who do not want or
5 Ideas to make money online without a blog

5 Ideas for a blog or a web site, without this you will help to make some money. Accurate and to show you our best to have the most elite practices. If you know where any of the methods, however, share it with us, we will be happy to

1. Freelancing

make money online easy way
Command and widely known by the idea to earn a lot of money. This is mostly used by professionals, but I have a website developed by you, or just the best way to create a Web site or any other web-script have to be honest understanding. You can easily just by working a few hours per day can earn about 500 dollars. Only this. If you've got a lot of experience to the increase in revenue Freelancing
Freelancers can now work with a freelancer who connects companies and organizations web portals are a number of grounds. When you first start Freelancing odesk.com elance.com the most reliable and bidding sites, portals, or you call the most reliable Freelancing sites need to create an account. The work that is given to you after you have accepted the bid for the projects you will. I have explained in more information Google it small. 5 Ideas to make money online Freelancing is considered to be the best idea

2. Article Writing

If you have a creative mind, and of course the obvious English.people the second most simple method is always to look for a professional Article Writer. You have to be very creative. There are many websites that make money by writing article, write a quality article. If you need to search on Google for the exact site. In general you have to pay $ 2. It is 100 per article you write. In the case of a day to earn you $ 10 if more than write articles on a daily basis 5. And the number of high-quality content articles to be copied. Freelance - Article Writing
Essay writing requires a lot of hard work and consistency. If you accept guest posts and also to write articles for their blog, you need to contact us to pay you. O this work, you may find blogs of interest to complete the work is not so hard. Creative Mind and worked as a writer, than you have an article, or if you want to win this easily. This web site or blog to earn money online without a 2 to 5 Ideas
really money making methods without investment

The popularity of the Internet to a large number of people looking to make money with article marketing is becoming. Article marketing, a karyapala to get some response, to promote different products or a great way to share your feedback.

There will be a lot of money with article marketing, but do not want to invest the time and effort to win. In general, the types of people are always looking for shortcuts. If you have them, I have to change your opinion or tell you that you will not see a dime.
Sharpen your skills before trying to earn money with article marketing

Before you even start thinking about money, you need to limit your skills. You, start a blog to share with friends and family in your articles and ask for feedback.
Make Money with Article Marketing Tip! If you are struggling to find ideas for your articles, you can try looking at the same things, but from a different angle, or some other point to try to resolve them.

You can obtain more knowledge and practice, you can start thinking about how to make money article marketing. Interestingly, the first thing you need to master the art of writing headlines, so you can get the reader's attention.

Make Money with Article Marketing

If you are short of ideas, you can look into your market and see what other people have to make a lot of money.

If you really want to make money with article marketing, you need to develop a plan of action. Learn more about your market and your potential visitors and their needs and try to answer their questions.

Also, it is to write your articles, playful fun, and a good method would be interesting. No one wants to read boring stuff.
Make Money with Article Marketing Tip! Readers are not always easy to "digest" so, try to break down your content. If you want specific guidelines, 500-700 words long articles, try to write a paragraph of 3-5 sentences.

Once you have writtne your articles, you need to figure a way to make money with article marketing. Many people like Ezinearticles, article directories, submit your articles for some free traffic, go to articles.
Make Money with Article Marketing - Warning: The hard work involved in the

If you want to make money with article marketing this no,, you will have to submit articles to write! Of course, you are dependent on the profitability of the market and the competition, but to prepare you for the hard work.

To write your articles, always creative and try to engage your readers. If you want to stand out from the crowd, you can get more visitors and will be able to make money with article marketing faster.

Keep in mind that if you invest the time to make money with article marketing. If you are not prepared to put the effort, do not expect good results. Also, you do not have quality control and always make sure that every article proofread and correct any errors. This is especially important if you are outsourcing your article writing!

Before deciding to write your articles, you have to assess your market and make a lot of money that you need to try to identify the top keywords. None of this is to search for keywords is useless to write a great article.

Article Marketing
Make Money with Article Marketing Tip! In addition to breaking up your articles, you can look to expand the bullet points in your articles, images and videos, can be used.

If you just started, it has no effect if you're in the market or from any response will be hard to make money with article marketing. So, when you are just starting, the use of the power of social media and friends and family to share in your articles. And they share it, and bring some cash to get it viral and an authority in the market, you can set up.

Get a little more, and when you have more experience, you will start to experiment. If you want to try an experiment in breaking up many pages in your article. This practice is very good for search engines, but the discharge of your customers, so you can use it intelligently.

I have before, you can write great articles, targeting the wrong keywords, you've said that making money is not the end, so as to get their head and try to answer questions they have, to think about your readers.

The following tips can help you make money quickly, but at the end, it all comes down to the effort you are willing to put into your campaigns. You can make money with article marketing, you have to put in a lot of effort.

3. Fiverr

make money through fiverr take projects

Things people do for $ 5 ™ Fiverr. There may be many, but knowing you have a fiverr Fiverr 5 $ for some of the work, the work that allows the user of a trusted website for free. Many of the works will be. For $ 5 you can, for example, a logo, for $ 5 you can work with some of the article, you sing something for $ 5 and many other Show Your Creativity is also required. fiverr
After creating your account, where you need to sign up first at fiverr.com start making money on Fiverr, you can also post your work for $ 5 in the search for categories. If you work on a daily basis 4 and then it will lead to $ 20 for a day, start your work for $ 5. Talented Use your mind that you need to remember to start earning on Fiverr. It is also not so easy, but if you do this it is very easy to learn.

 What is fiverr and how can we take projects 

fiverr tips to earn more money

Fiverr - the world's most trusted and you make money from Fiverr.Below the best tips and useful ideas to make money from Fiverr Freelancing sites are the best known, in a short time to make huge money.

Content Writing
You can earn a lot of money on Fiverr.com to submit your gig is the author of the best content for their business, many companies have a need for content authors.

Create a Video
Watermark your video by adding the name of your site as opposed to increase your site traffic.

Keywords focus on
If you're a new Fiverr gig, you had better think of a search engine similar to Fiverr. In general, you can get where you want to search the gig on Fiverr, the key to your performance enough to merge.

This is really all that is important to your presentation with these words, people of any services you offer, your performance will never find out. A web site with SEO with exactly the same, you've optimized your list.

Give something free or bonus
Poeple If you want to add a gig on Fiverr market, free goods, or something unique to give a bonus to the people you love, and make sure to add a description of why the right of people to buy your gig.

4. Email Marketing


In simple words can be used with email marketing affiliates to earn a large income. Yes, I've had offers for email marketing as a AffilaiteVIA and Vcomission There are a number of subsidiaries in India and then to talk about. They also need to send you all of the Mailers' and emails to provide ready. Or you just have to work for the email list. I'm working on a marketing email from the last 2 months and it is about 10 $ a day income. If you need a real email list to find the data.

Email Marketing - Guidelines

Then you or your email client to send email using any email marketing software. Also note: When you click the links of your affiliates, you can email the link, or the work is completed to earn a large income. From here, you can learn more about it. So the day started with your email marketing and in India Affiliates to earn. 5 Ideas to make money online without a blog, this method is very easy for me

how can we make money with email marketing 

email marketing moeny making methods
1 - Solo Ads Sell

If you list your ad to sell to others the business name of another person, usually selling solo ads. The more you pay $ 100 because of the other person, company or business email campaign to be completed.
2 - Supplemental products Cell

People should consider selling affiliate products to your list. You can sell them something completely random to sell any of your list of important niche.
3 - selling your own products

You can create your own products and sell them to your list by using the power of e-Junkie. Selling your's own own products is not easy, and it takes some time.

To make money with email marketing
4 - Sending Subscribers

Sign up for your list or the list of companies to get their nominations for each person willing to give you $ 1 or more. This is a very good way to make some extra cash.
5 - Sponsored email notifications

Instead of doing solo ads, sponsor of the email notifications you can charge more. You can send all of your emails, this is someone else's website, a banner ad here. The name of the campaign you can charge hundreds for twenty emails.
6 - Payment Reviews

You can write about their product and the fact that you can send to your list that you can be paid from some of the reviews.
7 - Cell Sites

If you want to return to your old websites, then your list is by selling websites. Many people want to buy the newly-created websites and domains, so that the industry is making big money.
8 - Donations

Newsletter at the end of each email you send, every one know that you are willing to accept donations at all costs.
9 - A New Website Promoting

If you built a new web site and you immediately want more traffic, people on your list as soon as you let the call. The key is to get more traffic as soon as possible. This is the only method to be very helpful.

Email lists are always important. There is a lot of people on your list if you really want to make a lot of money. Internet marketing is not easy to make money from this industry. The key for you as soon as possible to get more subscribers to your list and how to promote the general. There are many ideas you can get through as part of an autoresponder service. These online services are often an effective email marketing to enable you to great guides. This is one of them, because of the helpful review of the pure credit check. There is really a lot of money list. Your major goal is to monetize the list on the right path, and the most amount of cash from it as much as possible to look for is a way.

5. Using social media to pay to download


If you want a good social friends, and you can monetize from it. Pay per download, this method will work for you. You can always look for some premium software and a YouTube video to be found? Yes, these are all strategies for paying for downloads. It is the most searched for software or any thing you have to search. And you can download it as Fileice on-site rate of pay when the download is complete fake and you have to earn the file upload unnecessary.

5 Ideas to make money online


This is just an example or an idea. Monetization can be used for the payment of a download site, which has many creative ideas, you can make money from Fileice can find the full guide.

Legit ways to earn money through online, some of which is always good. If you are interested in earning blogging and websites. Then, without a blog to earn money online, or you have the best ideas of the above 5. It means to go through each of the words.
Real Estate Link Exchange Directory
Free link exchange and link building service for real estate themed websites.

11 Unique Ways to Boost Your Social Sharing with Buffer


buffer-sejWhen it comes to sharing on social media sites, you can be free from the real-time grind of sending as you type. There’s no need to do all your social media posting while sitting at a screen, thanks to a number of apps that do the job for you.
One of the best is Buffer, a social sharing scheduler that works with Twitter, Facebook, and LinkedIn. Buffer builds a queue of your content and sends it to your connected profiles throughout the day, whenever you deem best. You can set your own schedule (or let Buffer do it for you) and follow-up later with Buffer’s suite of analytics built directly into your dashboard. The service saves time, energy, and sanity in trying to keep up with social media’s constant content creation. The service is free, up to two accounts, and there are paid plans for those seeking more profiles and more features.
Looking for inspiration for effective Buffer uses? Here are 11 ways
Buffer can boost your social sharing.
1. Find your perfect Tweeting schedule and sync with Buffer
Websites like Tweriod and SocialBro can analyze your Tweeting and come up with a schedule that is ideal for optimizing your Tweet times so that you’re sending when your audience is listening. Buffer connects automatically with these sites so that your Buffer send schedule matches your Holy Grail of posting.
2. Get Buffer in your browser and schedule posts from anywhere
The Buffer browser extension for Chrome, Firefox, and Safari lets you clip a web page, photo, or text while browsing. No more copy and paste. Lots more efficiency, as you never have to leave the page to share what you’ve found.
3. Buffer straight from your favorite RSS reader
Clip your favorite stories as you read them thanks to Buffer’s compatibility with the leading RSS readers. Check out this post by Buffer co-founder Leo Widrich for five Google Reader alternatives—including Feedly and Reeder—that Buffer has covered. And if you’re into Google Reader until the bitter end, there’s support for it, too.
4. Put Buffer and IFTTT to work for you
Want to schedule a tweet each time it rains? Want to broadcast each of your Evernote shares onto your Facebook page? Tap into the power of IFTTT and Buffer to make it happen. IFTTT is a free service that lets you make connections with apps and sites based on a conditional statement—if this, then that. For example, if it rains, put a Tweet in my Buffer. If I share publicly on Evernote, have Buffer add it to my Facebook schedule. There is a section on the IFTTT site for user-created examples to get your creativity juices flowing.
5. Buffer with your email
If you’re struck by a moment of inspiration and email is all you have near, send your post to your Buffer email address—message in the subject line, link in the email body—and Buffer will add it to your queue. Power users can even attach commands to specify which accounts to buffer and whether or not to post right away.
6. Clip, create, and buffer from your phone
Buffer provides native apps for iPhone and Android devices so you can take advantage of the service wherever you are. The apps help connect popular services like mail, Flipboard, and Pocket to turn your phone into a super sharer.
7. ReTweet when you want to
Buffer works right within Twitter so you can snag your favorite Tweets from your feed and schedule a ReTweet for later. It’s ideal for those who log on only a few times each day and tend to clog their Twitter timeline with RTs when they do.
8. Share your Facebook favorites on your own time
Like its Twitter integration, Buffer also lets you queue your Facebook finds to post when you see fit. Share to your own timeline or your Facebook page, as Buffer supports both.
9. Track stats in your Buffer dashboard
Find out how many clicks, likes, ReTweets, and shares your content got with Buffer’s built-in analytics. The stats give you all you need to know and nothing more, delivered in a clear and concise way inside your dashboard. The best content you share receives a “Top” badge, which is good incentive to keep Tweeting and Facebooking.
10. Buffer your blog posts through WordPress
Each time you post through your WordPress blog, add your writing to your Buffer queue with the Buffer WordPress plugin. You control which profiles get the posts, and the plugin grabs media and more to optimize each post for each social network.
11. Increase shares on your site with the Buffer button
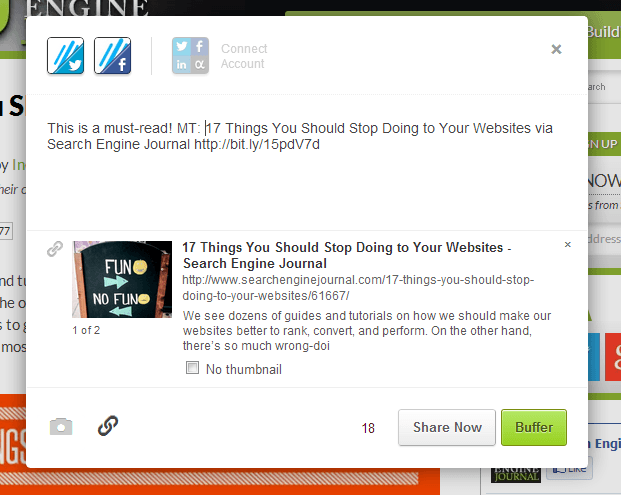
Along with the standard Twitter, Facebook, Google+, and other share buttons found on blog posts, the Buffer button lets readers share content right away or on a schedule with just two clicks. To make life easy on the blogger, the Buffer team developed the Digg Digg WordPress plugin, which adds a menu bar of share buttons, including Twitter, Facebook, Google+, and Buffer. To see it live on a website, look to the left of any Search Engine Journal post.
Conclusion
Buffer’s social scheduling app can be lifesaver for those feeling the crush of social media responsibilities. With a myriad of connected tools and services and an easy-to-use interface, Buffer has become my go-to tool for managing Twitter and Facebook posting. If you’re looking to improve your experience with social media, this is the tool for you.

Wednesday, March 13, 2013

How to Download Entire Mediafire Folder Without Premium Account

How to Download Entire Mediafire Folder Without Premium Account title=
How to Download Entire Mediafire Folder Without Premium Account ?
Hi all user, sometime you just find a cool MediaFire folder that contains your favorite movie, games or software, bunch of PDF's or whatever you want, but you actually don't want to download all files one by one because you sometime you find that it's a time consuming and annoying process isn't it? So today we want to share a better way to download entire folder from mediafire without a premium account, so lets get started.

Things you'll need :

First of all download Jdownloader
How to use :
First of all you will have to download jDownloader. After that do the following :

Try it : You can use this trick for downloading Certified Ethical Hacker v7 Instructor Slides.

Tip : At the bottom you can change the number of files that will be able to be downloaded at the same time!

Note : Your files will be saved at \JDownloader\downloads
Enjoy.......

Friday, March 8, 2013

Ways To Increase Adf.Ly Earnings and Make Quick Money Online

Welcome to Adf.ly Basics.
If you are new to Adf.ly or just need some tips in order to help boost your Adf.ly earnings, you have come to the right place.   Adf.ly is a link shortening service similar to tinyurl.com which shortens a link such as http://news.google.com/nwshp?hl=en&tab=wn 
This service not only makes it easier for you to post your links, but also pays you for everyone that clicks on it.  Currently Adf.ly pays up to $.050 to $4.00 for 1000 clicks of your link.

You maybe thinking "$.050 that's only pennies", or "how can I ever get 1000 clicks on my links."  I'll address those 2 questions below.

Earning pennies isn't much money?
My payment from Adf.ly last month.   Pennies can really add up fast.

Update: Latest payment:
image

1000 clicks?  Sounds impossible!
The main concern with most everyone using Adf.ly is TRAFFIC, and how to get more traffic to click on their links.  This is always a complicated question to answer because as everyone knows, it's not easy to generate your own traffic without a lot of long, hard work.   BUT there are ways where you can USE traffic from other sources.  Another thing to consider is that Adf.ly pays you for up to 5 visits from the SAME PERSON.  This means that if you have 5 links and the person clicks on all of them, you will get paid for all 5 visits!  So, basically, you will not need 1000 people to visit your links as long as you have multiple links for your visitor to click, thus you will need less people to reach that 1000 clicks.  I will list below, several ways to use traffic from other sources to help increase clicks to your Adf.ly links. 

Youtube traffic
This is probably the most well-known method to generate Adf.ly traffic.  The easiest method would be to find popular videos that are receiving a lot of views on Youtube.  Download the videos to your computer using one of the many free Youtube downloading sites or software.  Re-upload the videos to your own Youtube account and title it similarly, or as close as possible to the original up loaders title.  This method will get you views for your links posted below the clips, but I will go one step further to help you get the maximum amount of views.

Step 1.  Choose 3-4 videos in a certain genre (example: Breaking News). Download these videos and then re-upload them to your Youtube account, BUT, set only one of those videos to "public", the others set them to "unlisted".  The reason for this is that if ALL of your videos are "public", all one has to do is to check out your channel page and they can watch all of your videos without having to click on any Adf.ly links.
Step 2.  Create Adf.ly links to all of the "unlisted" videos.
Step 3.  Under the "public" video, post a caption like this "Breaking News story #2 etc... and then add your Adf.ly links below the clip.  If your "public" video is popular, you will definitely get views on your other videos, which means you will be getting Adf.ly clicks.
Step 4.  Rinse and repeat steps 1-3 using different videos from different genre (comedy, fails, songs etc)
Step 5.  Now go to your channel page.  On the left column you will be able to add all of your Adf.ly links and descriptions. (use the old channel view, the new one sucks IMO)

If you decide to go the Youtube route, don't just stop with 3-4 videos (one genre).  Try and find as many different genre videos to list.  If you can generate just 100 clicks from your 3-4 "News" videos a day, you can generate 1000 clicks from 10 different other genres, right?

Forum traffic
Another easy method getting traffic from other sources is to post your links on forums, news boards etc.  This is pretty self-explanatory and doesn't need much explaining.

Craigslist traffic
This is probably the FASTEST way to get clicks and traffic.  Now, getting Craigslist traffic is not as easy as just posting your links in ads.  Craigslist has banned the use of Adf.ly in posts.  However, all is not lost because I will show you an easy way to utilize Craigslist and it's millions of views per day.  Popular items can earn 1000's of hits a day during the life of the ad.   My method has worked extremely well and is only limited to the amount of ads you place.  It doesn't take a genius to figure out that if one post can bring you 1000 hits a day then 10 posts can bring you 10,000 hits a day.  Join me below and learn my method of using Craigslist traffic to boost your  Adfly income.

Of course I do not condone posting fake ads on Craigslist, and this is being shown only as an example of how to generate Craigslist traffic to your links.  That being said...

*Note: The tips listed above are just basic techniques that you can use to increase clicks.  Read below for information on how you can learn the advanced techniques that help me earn $100's per month!

An additional $2.60/1000 views?
While posting pictures on tinypic.com etc is a good way to host your pictures, we have been using picture hosts that PAY you every time someone views your images.  ImageTwist and Imageporter which pays up to $2.60 for every 1000 clicks of your picture.  Of course this works hand-in-hand with Adf.ly on Craigslist, coupling both of these services together will earning you up to $9.20 per 1000 views.  The only difference, is to replace the uploading of your pictures to tinypic.com to ImageTwist and ImagePorter instead.  If you do decide to use these sites, please use my ImageTwist referral link here and ImagePorter referral link here.  Join using my referral links and I will show you advanced techniques on how to earn maximum profits.
UPDATE:
Imagetwist and Imageporter have stopped paying for non-adult images.  If you do post adult images, these sites still do pay very well.  For non-adult images, I have switched to Imagehyper and found the results just as satisfactory.  They pay up to $2.70 per 1000 views of your images.


JOIN ME AND DOUBLE YOUR INCOME INSTANTLY!
Join me in Adfoc.us and effectively double your income instantly!  This company works on the same concept as Adf.ly, so it will be familiar to you and your visitors.  BUT, it pays up to $5.40 for 1000 views, that's more than Adf.ly!   See my payment proof:

image deleted


UPDATE:
Adfoc.us has stopped paying, (they owe me over $150).  For this reason I have stopped recommending this site and have started using Linkbucks.   For the people that have joined Adfoc.us using my referral ID, .  The same offer stands for anyone that joins Linkbucks using my referral ID.  Linkbucks does not pay as much as Adfoc.us but at least they have been around the longest and are very reliable.  They also pay 20%, 10% and 2% on your 1st-3rd level referrals respectively. The same techniques will work with Linkbucks and you will be able to add to your Adf.ly income if you follow my simple guides.  Sign up for Linkbucks here.

Wednesday, August 29, 2012

Tuesday, August 7, 2012

Geolocation in Android

Géolocalisation dans Android


Geolocation in Android

In this section we will resume our tutorial "in Google Map integration Android" that allowed to view a Google map in the main activity of the application and add markers.


  • LocationListener 
To use the services of geolocation android, the first step is to implement the interface LocationListener in the core business of our project "HelloMap".
  • LocationManager class provides access to location services system.
LocationListener is used for receiving notifications of LocationManager when the position changes. The latter uses four required methods which are:

     OnLocationChanged (Location location) Called when the user's position changes.
     OnProviderDisabled (String provider): Called when the source (GPS or Network) is disabled.
     OnProviderEnabled (String provider): Called when the source (GPS or network) is enabled.
     OnStatusChanged (String provider, int status, Bundle extras): Called when the status of the source changes.


AndroidManifest.xml

First we will add the required permissions to access the location services and GPS:

android:name="android.permission.ACCESS_COARSE_LOCATION'' />
android:name="android.permission.ACCESS_FINE_LOCATION''/>

 
MainActivity.java

Our main class must implement the interface LocationListener as follows:


public class MainActivity extends MapActivity implements LocationListener {
 
private MapView mapView = null;


private LocationManager lmanager;


private List  mapOverlays = null;


private OverlayItem overlayitem;


private GeoPoint point ;


private Drawable drawable;


private double lat, lng;

@Override
public void onCreate(Bundle savedInstanceState) {


super.onCreate(savedInstanceState);


// faire appel à notre vue principale qui contient la carte de Google maps
setContentView(R.layout.main);


mapView = (MapView) findViewById(R.id.mapview);


mapView.setBuiltInZoomControls(true);


mapView.setSatellite (true);


// ajouter le contrôleur de Zoom
mapView.setBuiltInZoomControls(
true);


// récupérer le service de localisation
lmanager = (LocationManager)getSystemService(Context.LOCATION_SERVICE);


// demander au service de localisation de nous notifier tout changement de position sur la source (GPS)
lmanager.requestLocationUpdates(LocationManager.GPS_PROVIDER, 0, 0,
this);


// récupérer l’icône qui sera affichée sur la carte
drawable =
this.getResources().getDrawable(R.drawable.marker);
}


@Override
protected boolean isRouteDisplayed()


{
return false;
}

// Lorsque la position change...
public void onLocationChanged(Location location) {}


// Lorsque la source (GPS ou Réseau 3G…) est activée
public void onProviderEnabled(String provider) {}


// Lorsque le statut de la source change
public void onStatusChanged(String provider, int status, Bundle extras) {}


// Lorsque la source (GPS ou réseau GSM) est désactivée
public void onProviderDisabled(String provider) {


// désactiver le service de Localisation et libérer les ressources

lManager.removeUpdates(this);

}}

  • OnLocationChanged

In this method we will recover the geographical coordinates of the terminal at each update (the frequency is defined through the method requestLocationUpdates ()). His details will be displayed to the user through a toast. We will also recover MapController class that will handle the zoom level of the map and animate it by changing the position of the terminal.
 
 @Override
public void onLocationChanged(Location location) {


if (location!=null)

{


// récupérer la liste "mapOverlays" des overlay ajoutés à notre MapView
mapOverlays = mapView.getOverlays();


lat = location.getLatitude(); // récupérer la Latitude de la position courante


lng = location.getLongitude(); // récupérer la Longitude de la position courante


// si "mapOverlays" est videif (mapOverlays.size()==0)


{


// ajouter un marqueur sur la position actuelle du terminal
newPosition();


}else
{


// supprimer tous les éléments de la liste
mapOverlays.clear();


newPosition();


}}
}
 
Here is the method to retrieve the position of the terminal and add a marker on the map:
 
public void newPosition (){
 
// créer un géopoint à partir de la position courante du terminal
point =
new GeoPoint((int) (lat * 1E6), (int) (lng * 1E6));


// ajouter un marqueur sur la position courante du terminal
overlayitem =
new OverlayItem(point, "Orange DevCenter", "je suis au dev center");


// instancier la classe "HelloItemizedOverlay"
HelloItemizedOverlay itemizedoverlay =
new HelloItemizedOverlay(drawable, MainActivity.this);


itemizedoverlay.addOverlay(overlayitem);


mapOverlays.add(itemizedoverlay);


mapView.invalidate(); // rafraichir la carte


Toast.makeText(getBaseContext(),


"Votre nouvelle position est: Latitude = " + (lat * 1E6) + " Longitude = " + (lng * 1E6),


Toast.LENGTH_SHORT).show(); // afficher la nouvelle position dans un Toast


mapView.getController().animateTo(point); // centrer la carte sur la position du terminal


mapView.getController().setZoom(12); // définir le niveau de zoom 12
}
 
  • Test

To test the geolocation service of our application, three options are available:

     Androphone:  Run application on an Android device physics and enable GPS
     Emulator:       Included with the SDK.
     A telnet client (PuTTYtel):   To use, just launch it and complete the fields below (Host Name: localhost and Port 5554). Regarding geolocation command is: geo fix latitude longitude.

In the event that you will use the Android emulator: In view of DDMS eclipse, you have the window "Emulator Control" in which he has the "Rent Control" where you can send your coordinates to emulator by entering the longitude and latitude of a given position.


Tuesday, July 24, 2012

How to Unsent | Undo A Send Email in Gmail

We does some time commit mistake and may be send wrong message or undesired message to different person but friends do you know there is a option of Undo/Unsent a send email in Gmail yes it can be possible ...

(May For Some People If they already know it then it might old for you )
if you know it then it is well and good if you don't know then follow this simple tutorial that helps you in undoing an E-mail.

Step By Step Guide for Undo/unsent a send email


  • First of all log in into your gmail account.(Obviously From Pc)

  • Goto "Settings" link in the upper right corner. It will be located next to your Gmail address in bold text to the left, and "Help" and "Sign Out" to the right. Click on it.

  • Locate the "Labs" tab. It will be near the end of the list of tabs. Click on "Labs" and wait for its loading .

  • Scroll to bottom of the page. With the available Google Labs options for Gmail listed in alphabetical order, this puts "Undo Send" at the end of the list. To the right of the brief information box are two bubbles. Check the "Enable" bubble, and then "Save Changes" at the very bottom.


  •  You Can also Customize the time delay. The default timing for delaying the sending of an email is 10 seconds. If you want you can change as per your requirement :D. 

  • Now when ever you send an email and test it your self there will be an option at the right side top corner for undo send email.

  • Click on that button and your email will be unsent. Showing message like “Sending Has Been Undone”


  • Now i guess this make you a clear idea how you can undo a send email .
    Well if you have two email id then you can test it and verify it thats all for today .
    Actually this post is demanded by one of my close mate "Suranjan Mund" So buda i guess you will like this .

    Thank you everyone do share :)

    Friday, July 20, 2012

    App Store bypassed without jailbreaking (how to install payed apps from apple store for free)


    in_app_purchase_hack_confirm
    Apple is investigating yet another security breach in its iTunes app store . A Russian hacker worked out a way that allows people to bypass payment in the App Store and download products for free.

    The hacker, dubbed ZonD80, posted a video of the crack on YouTube (Deleted by Youtube now) and claims that the technique makes it possible to beat Apple's payment systems by installing a couple of certificates and assigning a specific IP address to the device.

    The new service, which has already been subject to attempts at shutting it down, requires no jailbreaking and only minimal configuration changes. It works by funneling purchase requests through a server operated by the hacker, rather than the legitimate one offered by Apple. As a result, charges that normally would be applied to a user's account are bypassed.
    Below are the steps to the hack:
    • Install two certificates: CA and in-appstore.com.
    • Connect via Wi-Fi network and change the DNS to 62.76.189.117.
    • Press the Like button and enter your Apple ID & password.
    • Using the above hack, you are actually stealing in-app purchase content from developers, which is kind of disturbing and is of course against developer’s terms of service.
    ZonD80 is now asking for donations to set up a website to promote the hack."Why you must to pay for content, already included in purchased app? I think, you must not," he said.


    Apple has responded with the following statement:“The security of the App Store is incredibly important to us and the developer community,” Apple representative Natalie Harrison. “We take reports of fraudulent activity very seriously and we are investigating.”


    Saturday, July 14, 2012

    Metasploit 4 on iPhone 4S & iPad 2

    IMG 1002

    Metasploit 4 on iPhone 4S & iPad 2

    With the recent Absinthe Jailbreak which opens up firmware 5.1.1 to Cydia, we once again tried to get Metasploit running on these iBabies. After a bit of fiddling around with various ruby package versions, its seems like the following combination works well with the latest version of Metasploit 4.4.0-dev (as of May 2012).
    Of course, you need a jailbroken iPhone or iPad, with apt, OpenSSH server and a SSH client, such as iSSH. Once you are SSH’ed to your iPhone / iPad, run the following commands:

    # Install basic tools
    apt-get update
    apt-get dist-upgrade
    apt-get install wget subversion

    # Download correct version of ruby and dependencies
    wget http://ininjas.com/repo/debs/ruby_1.9.2-p180-1-1_iphoneos-arm.deb
    wget http://ininjas.com/repo/debs/iconv_1.14-1_iphoneos-arm.deb
    wget http://ininjas.com/repo/debs/zlib_1.2.3-1_iphoneos-arm.deb

    # Install them
    dpkg -i iconv_1.14-1_iphoneos-arm.deb
    dpkg -i zlib_1.2.3-1_iphoneos-arm.deb
    dpkg -i ruby_1.9.2-p180-1-1_iphoneos-arm.deb

    # Delete them
    rm -rf *.deb

    # Go into /private var and svn checkout the msf trunk.
    # Don't download the MSF tar.gz due to svn client versioning issues

    cd /private/var
    svn co https://www.metasploit.com/svn/framework3/trunk/ msf3
    cd msf3/

    # Check that Metasploit is running
    ruby msfconsole
    As no blog post is complete without a reverse shell screenshot, here’s a popped shell from the iPhone:

    Lynda iPhone SDK Essential Training 795MB Mediafire links


    iPhone SDK Essential Training presents the tools and skills needed to create applications for this mobile platform. Developer Simon Allardice breaks down the process of becoming an iPhone developer, from getting started with the tools and the language to building user interfaces and working with the unique features of the iPhone. With multiple hands-on exercises and demonstration projects, Simon explores the core development tools for iPhone (Xcode, Interface Builder, and Instruments), the language (Objective-C), and the framework (Cocoa Touch). Exercise files accompany this course.

    Table of Contents:

    Introduction
    • Welcome 01:16
    • Using the exercise files 01:03
    • What you should know 03:19
    1. Getting Started
    • Registering as an iPhone Developer 02:48
    • Installing the iPhone SDK 02:20
    • Joining the Apple iPhone Developer Program 02:04
    • Building a “simple” iPhone application 06:54
    • The “four pillars” of iPhone application development 01:38
    2. The Tools
    • Using Xcode 07:44
    • Using Interface Builder 04:45
    • Using the iPhone Simulator 04:13
    3. Writing Objective-C
    • Introducing Objective-C 04:28
    • Object orientation basics 08:34
    • Using existing classes in Cocoa 08:33
    • Optional video: Format specifiers 02:19
    • Calling methods in Objective-C 04:18
    • Writing your own classes 09:50
    • Compiling and running your application 05:38
    • Creating a simple Objective-C project 09:23
    4. Memory Management
    • Introduction to memory management 06:37
    • Object lifetime 06:31
    • Cleaning up 06:33
    • Using autorelease pools 05:05
    5. Core iPhone Project Skills
    • Using the different iPhone project templates 03:59
    • Using Model-View-Controller (MVC) 02:37
    • Basic interaction 12:46
    • Dismissing the keyboard 10:06
    • Understanding delegation 03:31
    • Alerting the user 06:50
    • How your application works 05:34
    6. Debugging and Troubleshooting
    • Troubleshooting your application 09:30
    • Creating and using breakpoints 08:28
    • Using zombies to fix problems 09:08
    7. Using UI Controls
    • Creating interfaces in Interface Builder 10:48
    • Using and customizing the Picker 05:23
    • Using data sources 11:53
    • Selecting an item in the Picker 06:31
    • Understanding and using the Apple UI guidelines 02:28
    8. Table Views
    • Creating a simple table 13:22
    • Reusing table cells 02:53
    • Customizing the table 05:44
    • Customizing table view cells 07:12
    9. Multi-View Applications
    • Introduction to Multiple View applications 02:35
    • Creating a utility application 06:53
    • Using Navigation Controllers 03:05
    • Creating a navigation application 13:38
    • Using a toolbar 11:44
    • Using a tab bar 08:09
    10. Using the Image Picker
    • Understanding the Image Picker 04:02
    • Using the Image Picker 05:43
    • Checking for available image sources 03:01
    11. Using the Accelerometer
    • Accelerometer concepts 04:17
    • Switching orientation 11:08
    • Reacting to a Shake event 04:32
    • Accessing accelerometer data 05:28
    12. Saving Data
    • Options for saving data on the iPhone 05:47
    • Saving iPhone application data to property lists 10:32
    • Saving iPhone application preferences 15:17
    13. Animation and Audio
    • Core animation basics 03:59
    • Using simple animations 04:48
    • Core audio basics 06:12
    • Playing audio files 09:23
    14. Finishing Touches
    • Creating an application launch image 04:08
    • Creating an application icon 02:58
    • Introduction to instruments 07:15
    • Where to go from here 02:33
    Conclusion
    • Goodbye
    DOWNLOAD  

    Password needed : free-4-free.blogspot.com


    Drupal Video Training- 29 Lessons mediafire download links 922 MB


    Manufacturer: Masterthe Drupal
    Year: 2009
    Language: English
    Video: TSCC 500x375 10.00fps 34Kbps
    Audio: MS ADPCM 22050Hz stereo 178Kbps

    A series of lessons for beginners get acquainted with the management system Drupal. A detailed description of each of the 30 lessons below ...


    Contents:
    Video 1 - An Introduction To Drupal
    In video 01 of the Drupal Video series, I will introduce you to and define CMS. Some say the Drupal is the best in the CMS arena, but which version of Drupal is right for you? This video will help you decide so don't skip this one

    Video 2 - Install Drupal The Easy Way
    In video 02 of the Drupal Video series, I will show you the easy way to install the software. If you can click a mouse and find the keys on your keyboard and click on a few of them, then you can install Drupal in just a few minutes after watching these videos.

    Video 3 - Install Drupal The Manual Way
    Video 03 in the Drupal series will show you how and tell you why you might want to manually install your Drupal software. After watching this video you will be overflowing with confidence in your new found ability to install this awesome program. No worries here, with this step-by-step video.

    Video 4 - Basic User Configuration
    In video 04 of the Drupal Series, you will understand how to create users and assign them various permissions. This will allow them to have access, or zero access to certain places and functions of your website.

    Video 5 - Basic Site Configuration
    In video 05 in the Drupal video series, you will learn how to configure your Drupal Website. When I first hear the words "Configure Your Website" it sounds difficult and time consuming. Not after watching this video it won't be.

    Video 6 - Drupal Blocks
    In Video 06 of the Drupal Video Series, you will get a better understanding of what Blocks are and how they will help organize your Drupal site. You are going to learn how to add, and configure your blocks. One of the many new features in version 6.x is how you are able to move your blocks from one place to another. Watch this video and find out how.

    Video 7 - Drupal Modules
    In this video we will introduce you to the Drupal Modules.
    Modules add tons of additional functionality to your Drupal web sites. We will show what they are, where they are and how to get them to work for you.

    Video 8 - Adding A WYSIWYG Module
    In this video in the Drupal video series you will see how to add a html editor module to your website. You will also learn how to configure it and this applies to adding most any module to your website.

    Video 9 - Drupal Reports
    In video 09 of the Drupal series you will be introduced to the reports section of your website. Sure reports sound boring, but in this video you will see the benefits of the reports section and how it will keep you informed of all the good, the bad and the ugly of what’s going on in your website.

    Video 10 - Actions & Triggers
    In this video we will show you what an action and a trigger are and how they can help simplify your life as a Drupal Website owner and administrator. These two items will automate some of your tasks so you can focus on some of the fun stuff.

    Video 11 - Drupal Themes
    In this video of the Drupal Video Series, you are going to learn all things Themes. Where to find more themes, how to customize your existing themes as well as install, enable and configure a new theme. As an added bonus, I'm going to show you how to customize your own shortcut icon also known as a favicon, and install it into your theme. Lets get to it!

    Video 12 - Content Type
    In this video on Content Type, we will discuss and define the various Content Types. After watching this video you will no longer be confused on what the difference is between a Page and a Story, or a Blog and a Book. Watch & Learn.

    Video 13 - Content - Add A Page
    In this video we will be adding content to our site in the form of a Page. You will learn the difference between a page and other forms of content. This and the other "Content Adding Videos" will get you going in the right direction for making your new Drupal web site ready for the public.

    Video 14 - Content – Add A Story
    In this video of the Drupal Video Series, you will be introduced to the adding Stories section. We will be adding an article to a new parent directory we create as well as adding a video to a different parent directory we create. This video is loaded with details, so you don't want to miss this one.

    Video 15 - Content – Add A Book
    In video 15 of the Drupal Video Series, we will be talking about the Book Function. You will learn how to create your Book and set it up so that others can contribute to it as well. This and the other Content Adding Videos are crucial to creating a unique Drupal Web site.

    Video 16 - Menus
    In video 16 of the Drupal Video Series, you will be introduced to the Menu function. The Menu is the same as navigation. You will learn how to create and organize the links to the various content created on your site. Don't allow your Drupal Site to be an unruly mass of content thrown all about - Watch this video!

    Video 17 - Taxonomy
    In this video in the Drupal Video Series we will tackle Taxonomy. We will break the code of confusion surrounding Drupal Taxonomy. You will learn how to use Taxonomy to arrange the clutter on your Drupal site to make it both user and search engine friendly. Watch and learn.

    Video 18 - Setting Up The Forum
    In this video you will be taken by the hand and shown the basics of setting up your own Drupal forum. Your forum will help keep your members informed and it’s the quickest way to create and sustain your own community

    Video 19 - SEO
    In this video we will cover some tips on making your Drupal site more search engine friendly. The better your sites SEO the better your ranking in the organic search results. This will increase the visitors to your site and this will increase your recurring income. Sounds like a video not to miss.

    Video 20 - Customizing The Front Page Part 1
    In this video you will learn how to customize your Drupal sites front page so that a different page view can appear depending on who is logging in. This video will show you how to add this massive amount of flexibility and functionality to an otherwise dull and plain front page.

    Video 21 - Customizing The Front Page Part 2
    In video 21 of the Learning Drupal Video Series, we will finish showing you how to customize your sites front page.

    Video 22 - Introduction To Setting Up Your Drupal Membership Site
    In this video you will be introduced to the process involved in adding membership functionality to your existing Drupal Site. Membership sites are a fantastic way to generate recurring income. If you provide unique and marketable information, why not get paid for it. There are several ways to setup a membership site - here is one of my favorites.

    Video 23 - Drupal Roles For Membership Site
    In this video you will learn a bit more about setting up various roles and permission levels in Drupal to work along side of the aMember script. We have touched on this in a previous video already but here we will take it a bit further for our membership site.

    Video 24 - How To Install The aMember Script
    In this video we will walk you through the process of installing the aMember script. If you are not familiar or comfortable with installing scripts, then this is a must see video. Set your fears aside and watch and learn.

    Video 25 - How To Configure aMember
    In this video you will be taken by the hand and shown the basics of setting up your aMember script. This lays the foundation for everything else to build from and you might be surprised at just how much is covered in this short video.

    Video 26 - How To Setup Your Payment Processor
    This is one of the most important videos in creating your Drupal membership site. Here we walk you through setting up your payment processor. Its simple really, no payment processor - no payment. This video takes all the guesswork out of setting up the payment processor.

    Video 27 - How To Create Your aMember Products (Levels Of Membership)
    In this video you will learn step-by-step how to create an aMembers product. For the purpose of these videos the product will be various levels of memberships like a Bronze, Silver and Gold Levels.

    Video 28 - How To Setup Protection For Your Different Products
    In video 28 in the Drupal Video How-To Series, by showing you how to protect your products you will learn how to provide different levels of content for different levels of membership. It’s so easy a caveman can do it. After watching this video you will be able to add almost instant value to your membership site by being able to add additional levels and charge accordingly.

    Video 29 - Test Your Membership Site
    In this video we will make sure all our t's are crossed and our i's are dotted. After you have put everything together it is time to test it all before you go live. You should be the one to find all the glitches and problem pieces...not your customers - This video will show you what to look for.

    Master the Drupal - 29 Lessons Mediafire:

    PASSWORD NEEDED :  free-4-free.blogspot.com